How to build a dapp on the Tezos EVM rollup
You can now port your existing Ethereum dapp or build a new one on Tezos!

Introduction
Optimistic rollups were added to Tezos during the Mumbai upgrade in March 2023. Optimistic rollups on Tezos (or smart rollups) open the door to new applications that would be otherwise impossible to build on Layer 1 for different reasons, for example, because of certain requirements like a higher execution speed.
Although the range of applications that can be built on a rollup is virtually limitless, there is one kind of rollup that has been long-awaited by the community and the developers: the EVM rollup!
What is the Tezos EVM rollup?
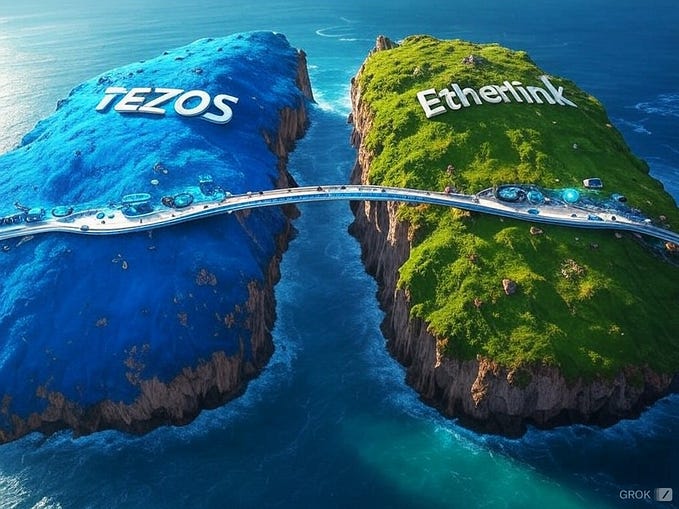
The EVM rollup is a special kind of rollup that can run the Ethereum Virtual Machine (EVM). What it means is that this rollup will be able to mimic the Ethereum blockchain and most importantly, execute smart contracts written in Solidity.
This is a very important feature of the EVM rollup, as it will allow developers who are already running applications on Ethereum or EVM-compatible chains to come to Tezos and deploy their already existing applications to the EVM rollup with very little work.
Note: at the time of writing, the Tezos EVM rollup was still under development. Although it worked as expected for the use case of this dapp, it may not work correctly for more complex applications as of September 2023.
The dapp you will build
In order to have a glimpse into the power of the EVM rollup, you will create a simple interface to interact with a basic ERC-20 token that lives on the EVM rollup. The interface will allow the users to claim 1000 tokens (called TACO) and then transfer part of their balance to other users of the rollup.
The dapp should also handle the connection to the right network (the EVM rollup operates on a different Ethereum network) and should fetch the different balances (Ctez and TACO) all through MetaMask.
All these interactions will be handled through the ethers.js library.
Deploying the smart contract
The contract for the TACO token is a standard ERC-20 contract, so you can use the template provided by OpenZeppelin as a template.
The TACo token contract itself is pretty simple, you will just import the ERC-20 template from OpenZeppelin and write some minimal code:
// contracts/GLDToken.sol
// SPDX-License-Identifier: MIT
pragma solidity ^0.8.18;

import "@openzeppelin/contracts/token/ERC20/ERC20.sol";

contract TacoToken is ERC20 {
    address public admin;
    mapping (address => bool) public claimed;
    constructor(uint256 initialSupply) ERC20("Taco", "TACO") {
        admin = msg.sender;
        _mint(msg.sender, initialSupply);
    }
    function claim () public {
        if (claimed[msg.sender] == false) {
            uint tokensToClaim = 1_000_000_000_000_000_000_000;
            _mint(msg.sender, tokensToClaim);
            claimed[msg.sender] = true;
        } else {
            revert("Tokens already claimed!");
        }
    }
    function hasClaimed (address user) public view returns (bool) {
        return claimed[user];
    }
}
As you can see, the contract is very simple, the constructor function assigns an admin by address and mints the provided initial balance to the admin's account.
The claim function checks if the sender didn't already claim their tokens and if not, mints 1,000,000 tokens to the sender's account. The function also populates a claimed mapping to keep track of the users who claimed their free tokens.
Finally, a hasClaimed function returns true if the user has already claimed their tokens or false otherwise.
Connecting to the rollup
Because we want the dapp to remain simple enough for this example, you will use the connection provider injected into the browser by MetaMask to connect to the rollup.
MetaMask injects useful functions into the window object of the browser to connect to an Ethereum network, which is the kind of network the EVM rollup exposes.
You will use the provider in the browser with ethers.js to carry out various tasks in the dapp, like connecting to the rollup or sending transactions.
The first thing to do is to import ethers:
import { ethers } from "ethers";After it’s imported, you will inject the provider from MetaMask into the ethers class to get an instance of ethers with all the different methods you will in the dapp:
const provider = new ethers.BrowserProvider((window as any).ethereum);Note: in a real-world production app, you shouldn’t use
(window as any)😅 but it will be good enough for this little app!
Once the provider is instantiated, you should verify that the user is connected to the right chain. Every Ethereum network has a different ID and the Tezos EVM rollup also has a specific one. If the user is already connected to it, you can finish the setup, if not, you should connect them to the rollup network.
const chainId = await (window as any).ethereum.request({
  method: "eth_chainId"
});
if (chainId === "0x1f47b") {
  currentBlockNumber = await provider.getBlockNumber();
  provider.on("block", async block => {
    // updates block number
    currentBlockNumber = block;
  });
} else {
    ...
}
The request method on the Ethereum provider injected by MetaMask returns an ID that you compare with "0x1f47b" (the ID of the EVM rollup network at the time of writing).
If the ID is correct, you can set an observer to fetch the block number every time a new block is mined in order to display it in the interface.
If it’s not correct, you will open a MetaMask popup to ask the user to connect to the EVM rollup:
try {
    await (window as any).ethereum.request({
      method: "wallet_addEthereumChain",
      params: [
        {
          chainId: "0x1f47b",
          chainName: "Tezos EVM",
          rpcUrls: ["https://evm.ghostnet-evm.tzalpha.net/"],
          nativeCurrency: {
            symbol: "CTEZ",
            decimals: 18
          }
        }
      ]
    });
} catch (addError) {
    console.log(addError);
}
This code will open a MetaMask popup with the different details of the EVM rollup network that the user must confirm in order to connect the dapp to the right network and continue using it.
After that’s set up, there is a last thing to do. You must set an observer to keep track of the changes in wallets in MetaMask. This is how it’s done:
const getUserEthBalance = async userAddress => {
    const balance = await provider.getBalance(userAddress);
    if (balance || balance === 0n) {
      return balance;
    } else {
      return undefined;
    }
};

const hasUserClaimedTokens = async userAddress => {
    // fetches token balance
    const contract = new ethers.Contract(
      config.contractAddress,
      config.contractAbi,
      provider
    );
    return await contract.claimed(userAddress);
};

(window as any).ethereum.on("accountsChanged", async accounts => {
  if (Array.isArray(accounts) && accounts.length === 0) {
    // user is disconnected
    userAddress = undefined;
    userEthBalance = undefined;
  } else if (Array.isArray(accounts) && accounts.length > 0) {
    // user is connected
    userAddress = accounts[0];
    userEthBalance = await getUserEthBalance(userAddress);
    hasClaimed = await hasUserClaimedTokens(userAddress);
  }
});
The observer is going to be triggered every time the wallet changes, so you can use it to watch connections to the dapp. If a wallet is connected, the observer returns an array where the first string is the currently connected address. You can then use that address to find the user’s balance in Ctez and TACO.
Reading balances (Ctez & TACO)
The next step in building the dapp is to read and display the balances of Ctez (the native token of the EVM rollup) and TACO (the token of the contract).
Reading the Ctez balance will be the easier step as the provider created with ethers.js gives you access to a method to get that value:
const getUserEthBalance = async userAddress => {
    const balance = await provider.getBalance(userAddress);
    if (balance || balance === 0n) {
      return balance;
    } else {
      return undefined;
    }
};
The provider instance exposes a getBalance async method that requires the address of the account you want to know the balance of as an argument. It then returns the balance of the account.
Note: the
getBalancemethod returns aBigInt, keep it in mind if you need to compare the balance with a number.
To read the TACO balance, you will create an abstraction of the contract and fetch the balance in the mapping, in a similar fashion to the way you would do it with Taquito.
const contract = new ethers.Contract(
    config.contractAddress,
    config.contractAbi,
    provider
);
const balance = await contract.balanceOf(userAddress);
You create an instance of the contract with the Contract class available on the ethers object. The constructor expects 3 arguments: the address of the contract, the contract ABI and the provider created earlier.
Note: the contract ABI is a JSON file that gives information about different data of the contract, like the storage type, the entrypoint parameters, etc.
Sending transactions
There are two types of transactions the dapp will send to the EVM rollup:
- A transaction to claim the free tokens
- A transaction to transfer tokens from one user to the other
These transactions are a little different on Ethereum, but the general idea is the same: you create a payload, sign it, inject it and update the state of the smart contract.
Claiming the free tokens
The smart contract for the TACO token features a mapping that records which address has claimed their free tokens. The dapp checks if the wallet that’s currently logged in has fetched its tokens and shows a button to claim the tokens if they haven’t been claimed.
ethers.js makes it very easy to create a transaction to interact with a smart contract, here is the full code required to claim the tokens from the front-end:
try {
    const signer = await provider.getSigner();
    const contract = new ethers.Contract(
        contractAddress,
        contractAbi,
        signer
    );
    const tx = await contract.claim();
    const receipt = await tx.wait();
    // receipt.status = 0 -> error
    // receipt.status = 1 -> confirmed
    if (receipt.status === 1) {
    // updates the balance
    userBalance =
         BigInt(userBalance ? userBalance : 0) +
         BigInt(1000000000000000000000);
    } else {
        // handles the error here
    }
} catch (error) {
  console.error(error);
} finally {
  // updates the interface here
}
First, you create a signer that will sign the transaction by using the provider created earlier.
Once created, you need an instance of the contract created with new ethers.Contract and you pass the address of the contract, its ABI and the signer as parameters.
Now that the instance of the contract is available, it will have async methods named after the entrypoints of the contract. You can call await contract.claim() with no parameter to claim the free tokens.
This operation returns a transaction with a wait method that you can call to wait for the receipt of the transaction.
The receipt has a status property that indicates if the transaction was successful. If the status is 1, the transaction was successful. You can update the balance of the user shown in the interface.
Transferring tokens
Many of the steps required to transfer tokens at the smart contract level from one account to the other are similar to the ones in the previous paragraph, so let’s have a look at the code:
try {
    if (!transferAmount) throw "No amount";
    if (!transferTo) throw "No recipient";

    const signer = await provider.getSigner();
    const contract = new ethers.Contract(
        contractAddress,
        contractAbi,
        signer
    );
    const amountToTransfer = parseUnits(transferAmount, config.decimals);
    const tx = await contract.transfer(transferTo, amountToTransfer);
    const receipt = await tx.wait();
    if (receipt.status === 1) {
        transferAmount = null;
        transferTo = null;
        userBalance = BigInt(userBalance) - amountToTransfer;
    } else {
        // handles the error here
    }
} catch (error) {
    console.error(error);
} finally {
    // updates the interface here
}
Every time you want to send a transaction to a smart contract on the EVM rollup, you must create a signer and an instance of the contract to interact with it, as demonstrated in the previous part.
ethers.js provides a function called parseUnits to convert the amount input by the user to its correct representation in the contract. For example, if the user enters 10 and the token has 6 decimals, the amount sent to the contract will be 10_000_000.
Once again, to send a transaction to one of the entrypoints of the contract, you will just call the method with the same name. This time though, you must pass 2 parameters: the address of the receipient and the amount to transfer.
You wait for the transaction to be confirmed and you can check its status. Once confirmed, you can update the balance of the user to show that the transfer was successful.
Conclusion
One of the main advantages of the EVM rollup on Tezos is to give Ethereum developers the same experience of building a dapp. They can use the tools, frameworks and libraries they like to create applications on a rollup that also benefits from the security layer of the Tezos blockchain.
The end users will also appreciate using tools they are already used to, like MetaMask, to interact with an application on a rollup that doesn’t compromise on security or decentralization.

